PLaTHEA
PLaTHEA -
People Localization and Tracking for Home Automation is a
vision-based indoor human localization and tracking system. The
source code is freely available under GPL license via SVN at
svn://svn.code.sf.net/p/plathea/code/trunk or visiting the
SourceForge page of the
project.
In the following, we will demostrate the use of PLaTHEA using as input a recorded video sequence with three persons moving into a smart environment. All the necessary precompiled executables, libraries, video files and configuration files can be dowloaded here. In order to employ the PLaTHEA DPWS interface we suggest to download the WS4D DPWS Explorer here.
STEP 1: Extract the content of the provided zip file and open "PLaTHEA.exe". In order to run the software you will need Windows 7 64 bit (or superior) and Visual C++ 2012 Runtime Library for x64 applications (freely downloadable from Microsoft web site).
STEP 1a (optional): In order to try the DPWS interface:
1) run "PLaTHEADPWS.jar" (it requires a Java Virtual Machine to be installed)
2) run the WS4d DPWS explorer, click on Search and look for PLaTHEADevice
3) The PLaTHEADevice contains 2 services. The first one, called PLaTHEASynchronousIFace, contains synchronous calls. The second one, called PLaTHEAAsynchronousIFace, gives the possibility to subscribe to all the different updates coming from PLaTHEA.
STEP 2: From the "System" menu select "Load Experiment File..." and then open "experiment.xml" from the common dialog (see Figure 1).
 |
| Figure 1 |
STEP
3: Now we have to configure PLaTHEA to execute over a
previously recorded test. In order to do this we have to load
internal and external calibration parameters of the original
cameras and then activate the virtual "playback" camera. First
of all select "Internal Calibration Procedure" from the
"Calibration" menu; the window depicted in Figure 2 will appear;
clicking on Load it will be possible to select "InternalCalibration" folder (Figure 3).
 |
 |
|
Figure
2 |
Figure
3 |
STEP
4: In order to load external calibration parameters,
select "Load External Calibration Data" from the "Calibration"
menu and then select the "External Calibration" folder
(Figure 4).
 |
|
Figure
4 |
STEP 5: In order to load the SVM classifier needed for tracking, select "Select SVM Classifier..." from the "Localization Engine" menu and then select the "Tracking\svmclassifier.xml" file (Figure 5).
 |
|
Figure
5 |
STEP
6: Selecting "Initialize System" from the "System" menu
the window depicted in Figure 6 will appear. Here we have to
select "Virtual Acquisition Camera" as camera model and check
"Undistort and Rectify". Clicking on the OK button the virtual
acquisition camera will be initialized.
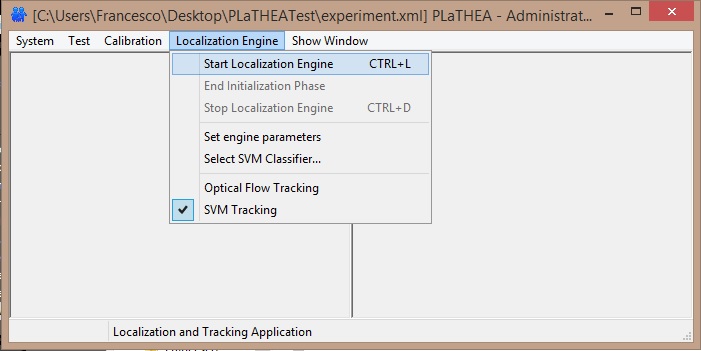
STEP 7: Start the localization engine clicking on "Start Localization Engine" from the "Localization Engine" menu (see Figure 7). Click the yes button on the showed Message Box.
STEP 7: Start the localization engine clicking on "Start Localization Engine" from the "Localization Engine" menu (see Figure 7). Click the yes button on the showed Message Box.
 |
 |
|
Figure
6 |
Figure
7 |
STEP
8: Now we have to open the Position Test dialog (Figure
8) clicking on "Position Test" from the "Test" menu (Figure 9)
answering yes to the message box. From the position test dialog
select "Best Yellow Path" from the leftmost list view control,
check the "Occupancy/Height map" option and then click on
"Start" button.
STEP
9: At this moment you will see PLaTHEA performing a
localization task. The system shows tracked objects with their
occupancy and height (see Figure 10).
STEP 10: Once the test has completed (you will see tracked object stuck on the screen) we can stop the localization task using the "Stop" button and then save the system measurements for PErIcLeS performance evaluation using the "Save Last Test" button.
STEP 11: Close the position test dialog.
STEP 10: Once the test has completed (you will see tracked object stuck on the screen) we can stop the localization task using the "Stop" button and then save the system measurements for PErIcLeS performance evaluation using the "Save Last Test" button.
STEP 11: Close the position test dialog.


